
Map editing: Interface & controls
Learning and understanding the interface and controls are the first step to map editing...
The interface
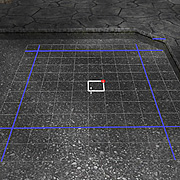 |
The "cube grid"
This will be shown as a white grid of squares drawn where ever you point.
|
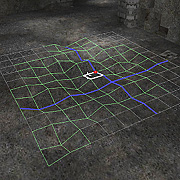 |
Heightfield cubes
These are the light green cubes in the grid. |
 |
Cube selector
This appears as a small white box with a red dot in the corner. It will appear in the middle of the screen and you can use it to select
geometry, a bit like a crosshair. |
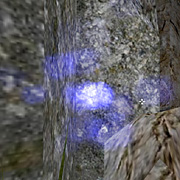 |
Entity sparkles These are shown as blue sparkly dots. They are known as "entities", which will be explained later here. Note: The sparkly of the nearest entity will show up orange. |
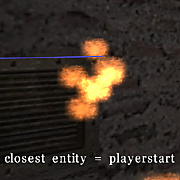 |
"Nearest entity" text
This is the white writing along the bottom. It will tell you the location of the closest entity and its properties. |
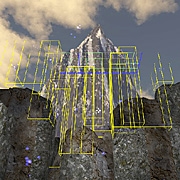 |
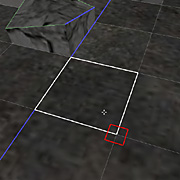
Yellow clip box These boxes will be shown where clip entities are used and depict the total size of the clip. See the clips section on the entities page for more information. |
To get a feel for editmode, press E and float around. Try clicking and dragging the small white box at your crosshair over some cubes (you will see a red box over what you are selecting). This is how you select geometry.
Map editing controls
Below are the controls that get used in map-editing, you will use most of these controls
when creating a map, so it's good to learn them
Note: These controls can ONLY be used in map editing mode.
Changing geometry
| Control | Function |
| [ | Moves cubes in the floor downwards. |
| ] | Moves cubes in the floor upwards. |
| O | Moves cubes in the ceiling downwards. |
| P | Moves cubes in the ceiling upwards. |
| Note: The mouse controls are easier. | |
| F | Makes selected cubes a solid. |
| G | Makes selected cubes a space/non-heightfield. |
| K | Makes selected cubes a corner. |
| C | Copy selected cubes. |
| V |
Pastes copied cubes. Note: It pastes from the upper corner of the red dot. |
| U | Undoes the last action (only applies to geometry). |
| , | Equalize the floor. |
| . | Equalize the ceiling. |
| H | Makes the floor a heightfield. |
| I | Makes the ceiling a heightfield. |
| 9 | Manipulates the corner of a cube where the red dot is positioned upwards. Works only if the cube is a heightfield. |
| 8 | Manipulates the corner of a cube where the red dot is positioned downwards. Works only if the cube is a heightfield. |
Changing textures
| Control | Function |
| Home | Browses forward through wall textures. |
| End | Browses backward through wall textures. |
| 7 (on the keypad) | Browses forward through upper-wall textures. |
| 4 (on the keypad) | Browses backward through upper-wall textures. |
| Insert | Browses forward through floor textures. |
| Delete | Browses backward through floor textures. |
| PageUp | Browses forward through ceiling textures. |
| PageDown | Browses backward through ceiling textures. |
Mouse controls
| Control | Function |
| Left-click | Allows you to select cubes. |
| Right-click | Show the editing menu. |
| Scrolling | Scrolling will move cubes up/down, depending on the direction you look. |
| Hold Q and scroll | This will manipulate the corner of a cube where the red dot is positioned up/down. Works only if the cube is a heightfield. |
| Hold Z and scroll | Scrolls forward/backwards through textures on the floor/ceiling, depending on the direction you look. |
| Hold X and scroll | Scrolls forward/backwards through textures on the wall/upper-wall, depending on the direction you look. |
| Hold 1 and scroll | Change the first attribute value of the closest entity. |
| Hold 2 and scroll | Change the second attribute value of the closest entity. |
| Hold 3 and scroll | Change the third attribute value of the closest entity. |
| Hold 4 and scroll | Change the fourth attribute value of the closest entity. |
| Hold M and scroll | Move the closest entity in the axis of the direction you look. |
Misc
| Control | Function |
| E | Toggle edit mode. |
| Backspace | Delete entity. |
| ; | Entset |
| L | Shows the lighting menu. |
| F5 | Toggle occlusion on/off. |
| F6 | Toggle showmip on/off. |